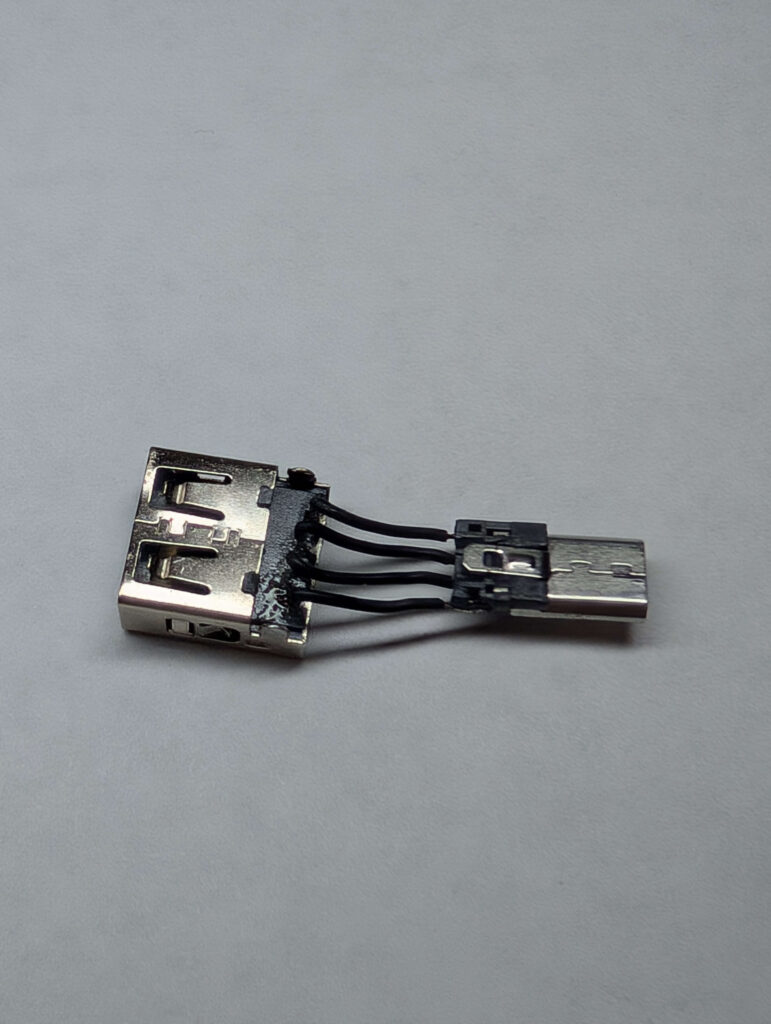
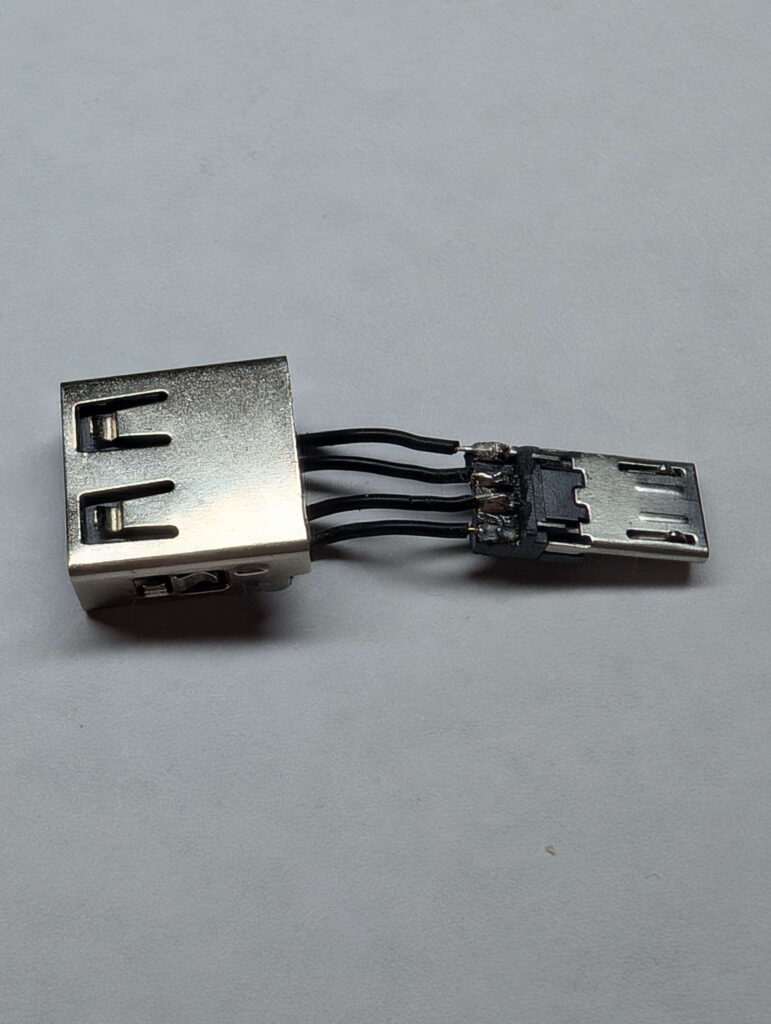
Ever found yourself in a bind needing a specific cable or adapter but not having one handy? That happened to me when I needed to connect my keyboard to a Raspberry Pi Zero 2. While I had power connected to the Micro USB port, I still needed a USB A to Micro USB adapter for the keyboard. Waiting for an Amazon delivery wasn’t an option, so I decided to make one myself. After all, what’s the point of being an engineer if you can’t improvise on the spot?
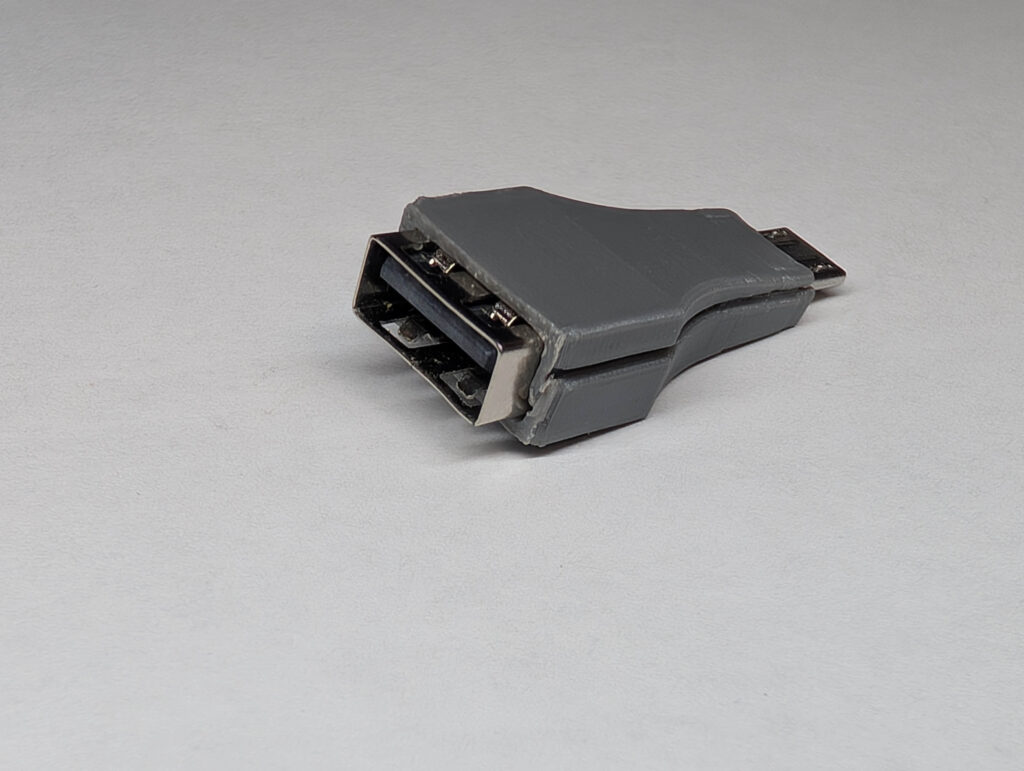
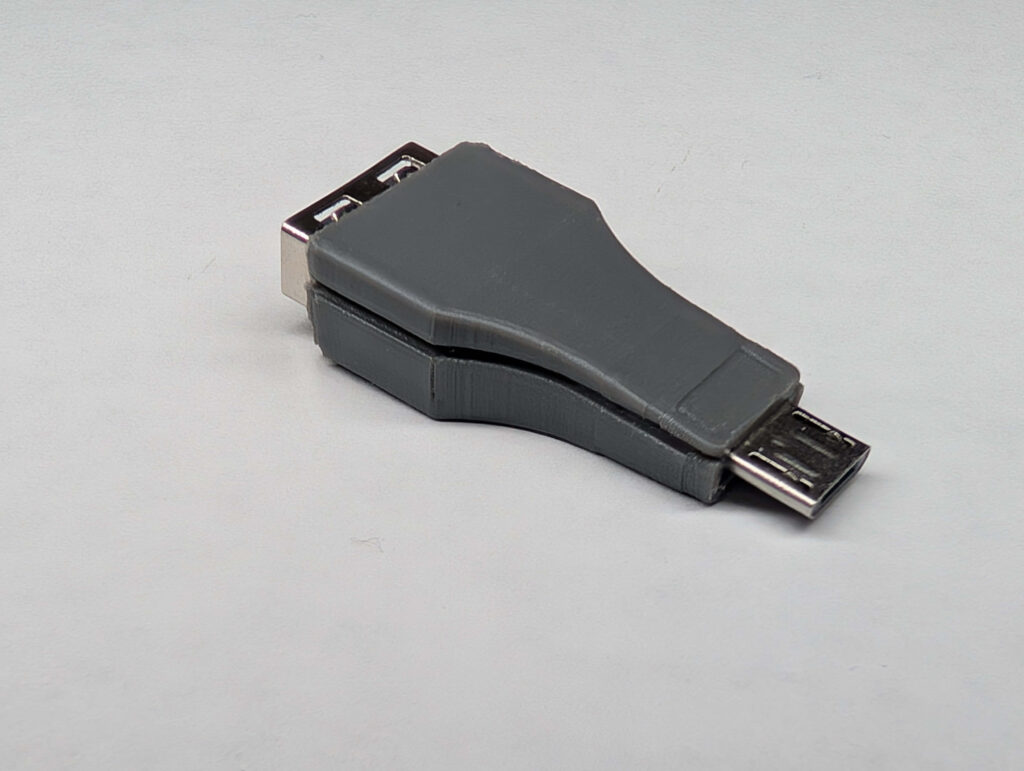
This is the DIY OTG (On-The-Go) adapter I came up with. It’s simple, functional, and, most importantly, it works. Let me walk you through the process so you can make one too.
Materials Used:
- A 3D-printed case for the final assembly (optional but highly recommended).
- A USB AF (Female) connector salvaged from an old battery charging board.
- A Micro USB male connector taken from an old cable.
- Basic soldering equipment.
Step-by-Step Instructions:
1. Understanding the Wiring
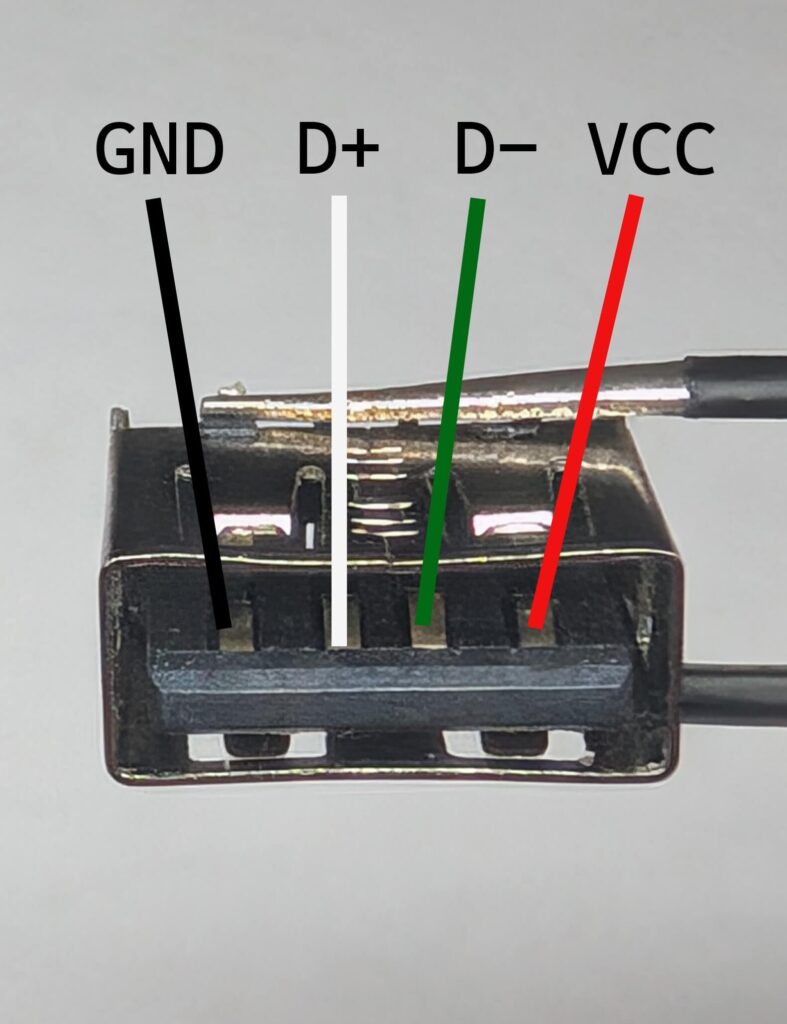
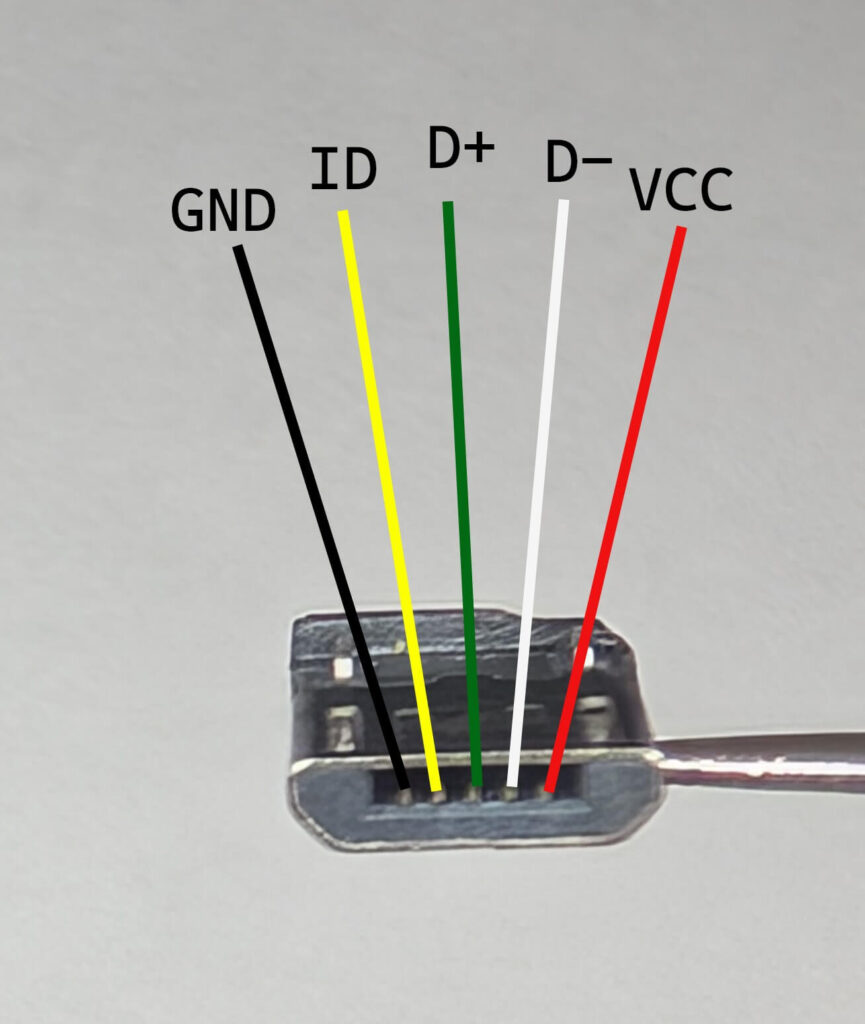
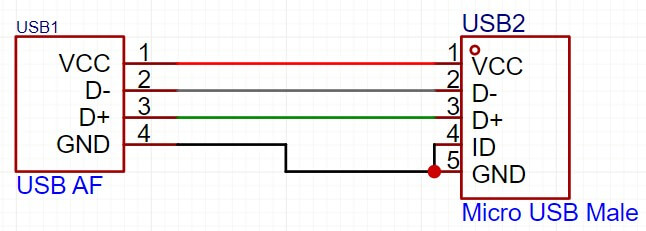
To build this adapter, it’s crucial to connect the pins correctly. Refer to the provided wiring diagram:
- VCC (Red wire): Power connection
- D- (White wire): Data transfer (negative)
- D+ (Green wire): Data transfer (positive)
- GND (Black wire): Ground connection
- ID (Yellow wire): Optional, but for OTG functionality, it needs to be grounded.
In my case, I initially missed connecting the ID pin to Ground, which caused the adapter to not function. If your Micro USB connector only has four pads instead of five, you can solder the fourth and fifth conductive pins together to ensure the OTG functionality works.
2. Soldering the Components
- Double-check each connection to avoid any short circuits or miswiring.
- Carefully solder the wires from the USB AF connector to the Micro USB male connector as per the wiring diagram. Make sure your connections are clean and secure.
3. Testing the Adapter
Before encasing the adapter, test it with your intended setup (e.g., connecting a keyboard to a Raspberry Pi). If it doesn’t work, recheck the ID and Ground connections, as they are often the issue with OTG setups.
4. 3D-Printing the Case
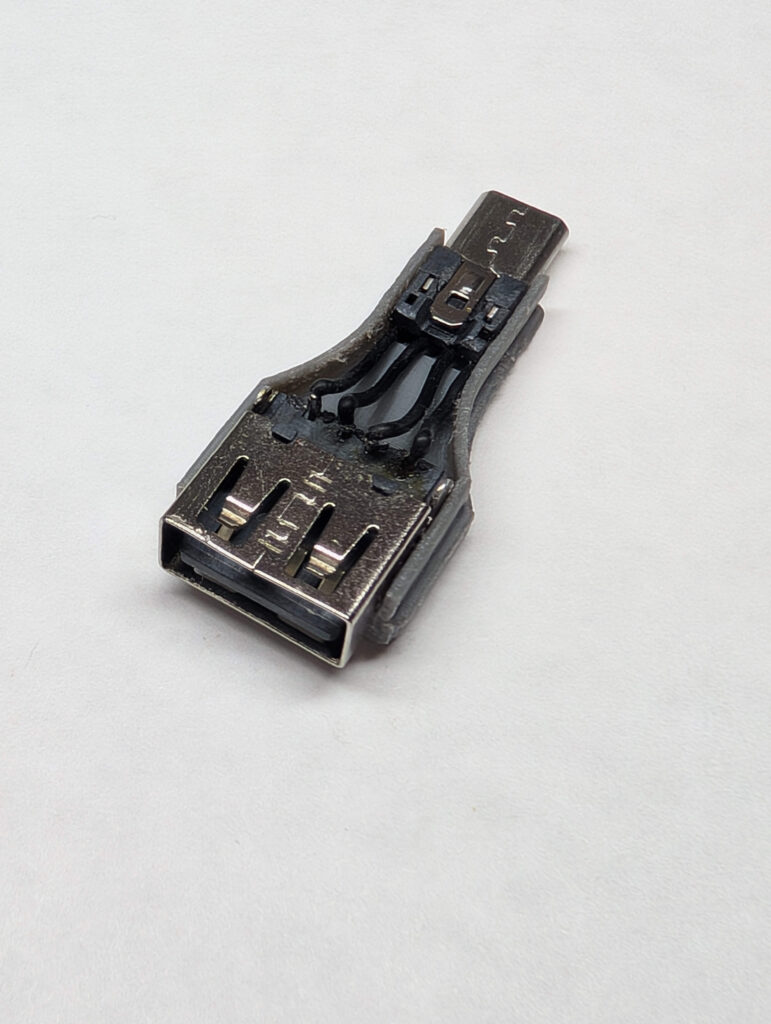
To give the adapter a polished look and protect the soldered connections, I designed and 3D-printed a case using PLA plastic. The case snugly fits around the adapter, securing the components while maintaining a sleek appearance.
If you’d like to 3D print this case yourself, you can download the STL files for the two parts of the case here:
Here’s a photo of the adapter as I started the assembly process:
This adapter has been a total lifesaver, and honestly, making it myself just makes it so much more satisfying. If you ever find yourself in a similar situation, don’t wait—just try building one yourself. You’ll be glad you did!


