Welcome to Java programming!
This series of posts is designed to be a refresher for experienced developers and a friendly starting point for beginners. Since this is the first post in the collection, let’s dive right in!
What is Java?
Java is an object-oriented programming language developed by James Gosling at Sun Microsystems, which was later acquired by Oracle Corporation. Since its release in 1995, Java has become one of the most popular programming languages worldwide.
Why is Java So Popular?
- Versatility: Java is used to develop applications for desktops, web, and mobile devices.
- Platform Independence: This is one of Java’s standout features. Java code is first compiled into bytecode, which is platform-independent. Whether you’re using Windows, Mac, or Linux, the bytecode remains the same.
- Java Virtual Machine (JVM): To run a Java program, the JVM converts bytecode into machine code specific to your operating system. This two-step compilation ensures that Java programs can run on any device with a JVM installed.
Installing the Java Development Kit (JDK)
Before you can start programming in Java, you need to install the JDK (Java Development Kit).
For this post, we’ll use JDK 17.
Steps to Download JDK:
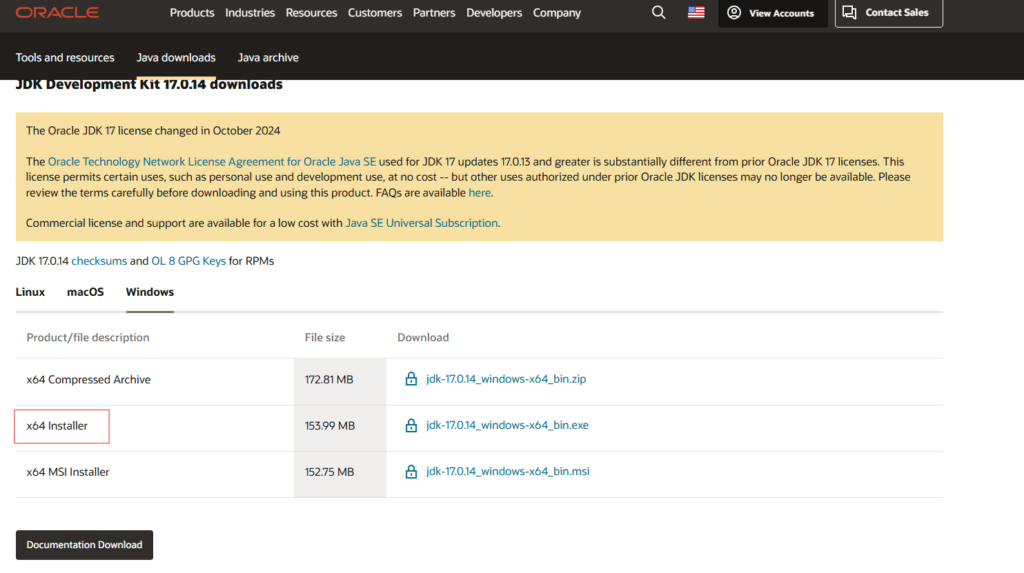
- Go to Oracle’s Java Downloads Page.
- Scroll down to Java 17 and select the tab for your operating system (Windows, macOS, or Linux).
- Download and install the JDK.
What is the JDK?
The JDK is a free toolkit provided by Oracle, containing essential tools such as:
- Compiler (javac.exe): Compiles your Java code into bytecode.
- Archiver (jar.exe): Packages and distributes Java files.
- Documentation Generator (javadoc.exe): Creates HTML documentation from Java code.
The JDK also includes the Java Runtime Environment (JRE), which contains the JVM required to run Java programs.
Your First Java Program
To write our first program, we’ll use IntelliJ IDEA, a popular Integrated Development Environment (IDE).
Installing IntelliJ IDEA
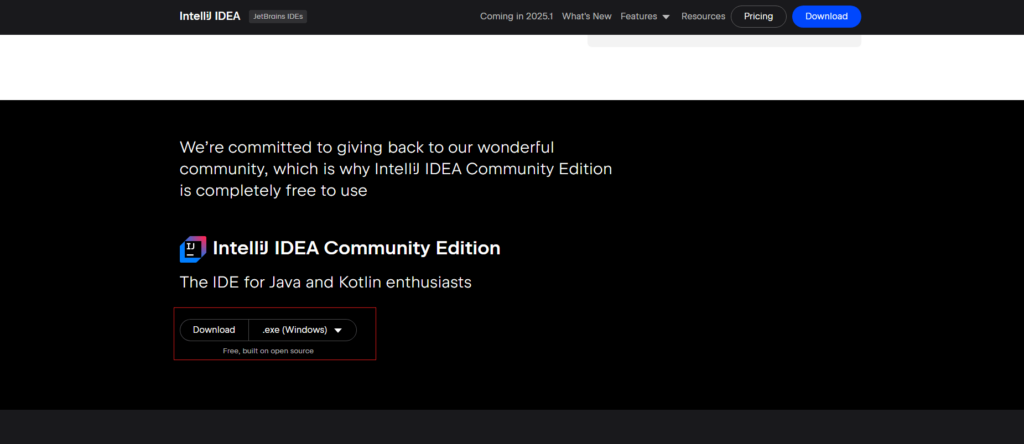
- Visit IntelliJ IDEA’s website.
- Download the Community Edition, which is free and sufficient for our needs.
- Follow the installation steps for your operating system.
Creating a New Java Project
Once IntelliJ IDEA is installed:
1. Launch the IDE and select New Project.

2. In the New Project dialog:
- Name your project HelloWorld.
- Choose your preferred location for the project.
- Select Gradle as the build system.
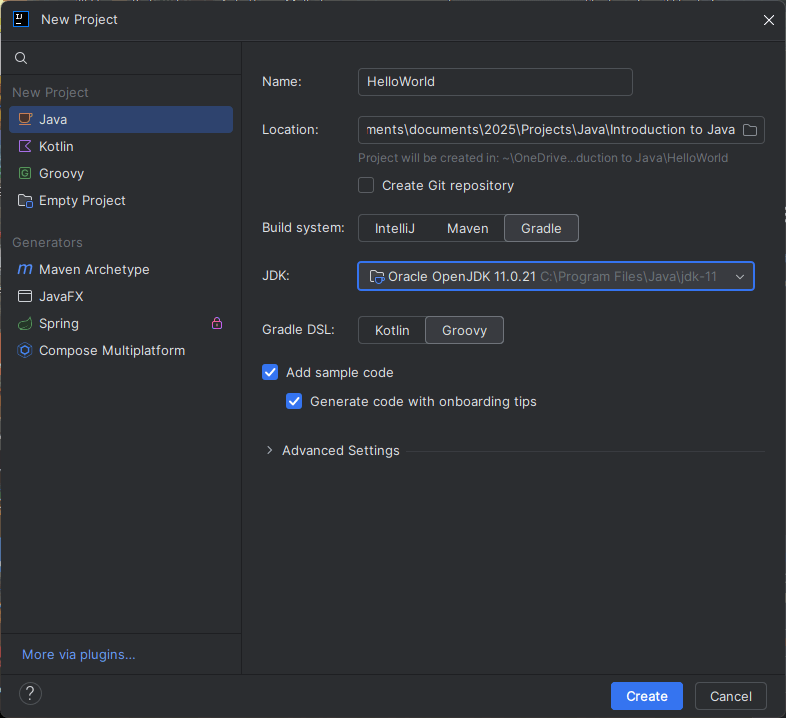
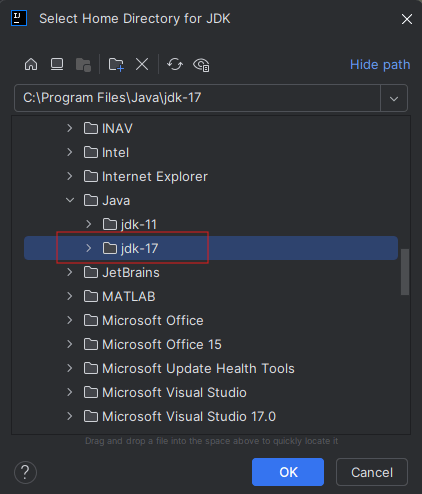
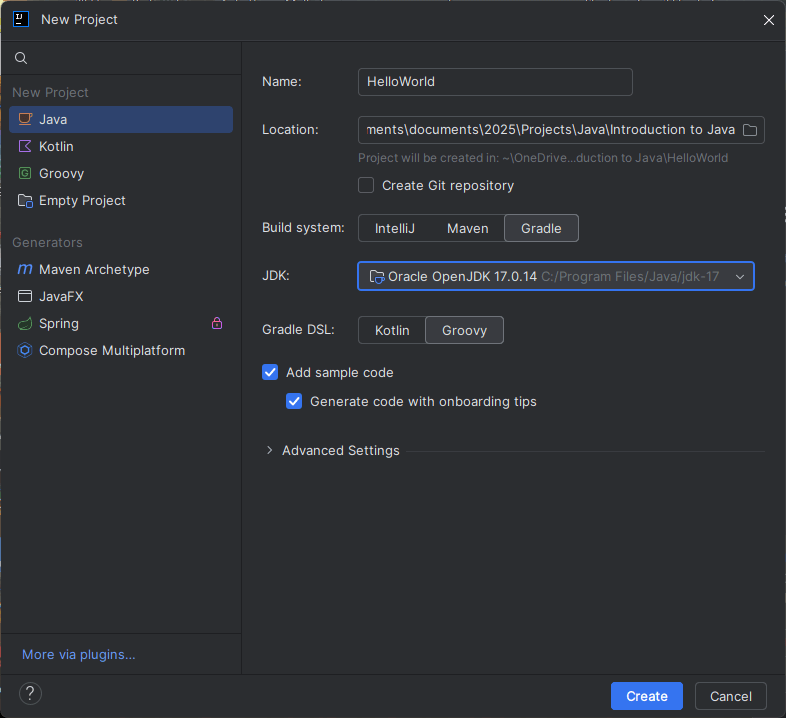
- For JDK, select Add JDK from Disk… and navigate to the directory where JDK 17 is installed (e.g.,
C:\Program Files\Java\jdk-17).
3. Click Create.
Writing Your First Program
Replace the default template with the following code:
package org.example;

public class Main {
    public static void main(String[] args) {
        // Print the words Hello and welcome! on the screen
        System.out.print("Hello and welcome!");
    }
}
Pro Tip: While you can copy and paste the code, typing it out will help you get familiar with IntelliJ IDEA.
Running Your Program
1. Click the Run button (a green triangle) at the top menu.
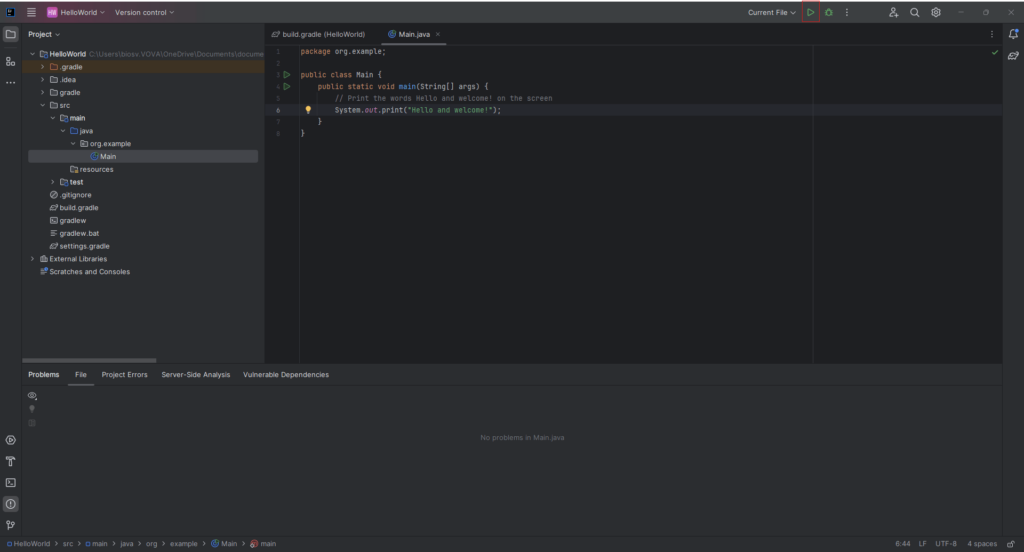
2. If everything is set up correctly, the output window will display:
> Task :compileJava UP-TO-DATE
> Task :processResources NO-SOURCE
> Task :classes UP-TO-DATE

> Task :org.example.Main.main()
Hello and welcome!
BUILD SUCCESSFUL in 146ms
2 actionable tasks: 1 executed, 1 up-to-date
11:44:20 AM: Execution finished ':org.example.Main.main()'.
The “Hello and welcome!” message is the output of your program. Additional messages are generated by the IDE and not part of your program’s output.
Congratulations! You’ve successfully written and executed your first Java program. This simple exercise is just the beginning of your Java journey. Stay tuned for the next post, where we’ll explore more about Java’s syntax and features.


