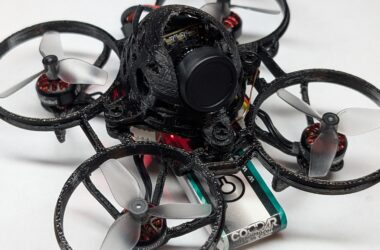
If you love to build things—especially small drones you can safely fly inside your home—then a 1S whoop FPV drone is a perfect project. Its lightweight design and simple power system make it ideal for indoor flying and small outdoor spaces. This guide will walk you through the process of building your very own 1S whoop FPV drone.
Materials Needed
- Frame: A lightweight and durable 1S whoop frame. I recommend using PETG filament for its strength and flexibility.
- Flight Controller: Happymodel Crazybee F4 Lite 1S Flight Controller Built-in 5.8G VTX 4in1 ESC Frsky / Flysky RX for Mobula 6 Tiny BWhoop
- Propellers: 32pcs 31mm 3-Blade Props with 1.0 mm Shaft Micro Whoop Drone Propellers for Tiny Whoop FPV Racing Whoop Like iFlight A65 Quadcopter(Grey and Transparent Blue)
- 1S LiPo Battery: Choose either:
– 6 Packs CODDAR 500mAh 1S 3.8V 100C HV LiPo Battery with Plastic Head PH2.0 for EMAX Tinyhawk Brushless Drone Kingkong Tiny7 Beta75S Quads Quadcoper CD1S500100HVP
– GAONENG 6pcs 380mAh 60C 1S LiPo Battery 3.8V/4.35V LiHv Battery with JST-PH 2.0 Connector for UZ65 Tiny Whoop Micro FPV Racing Drone
- Fasteners:
– 1350/2010x Black Mini Micro Phillips Flat Countersunk Head Self Tapping Wood Screw Set M1 M1.2 M1.4 M1.7 M2 M3 M4 assortment Kit
– M2 4mm screws for securing the FPV camera.
Step1: 3D Printing the Frame
Use the provided links below to download the STEP files for your 1S whoop frame:
If you have a Bambu Lab A1 Mini printer, you can use this configuration file to optimize your printing results. I’m using PETG filament to print the frame, which provides excellent strength and flexibility for this project.
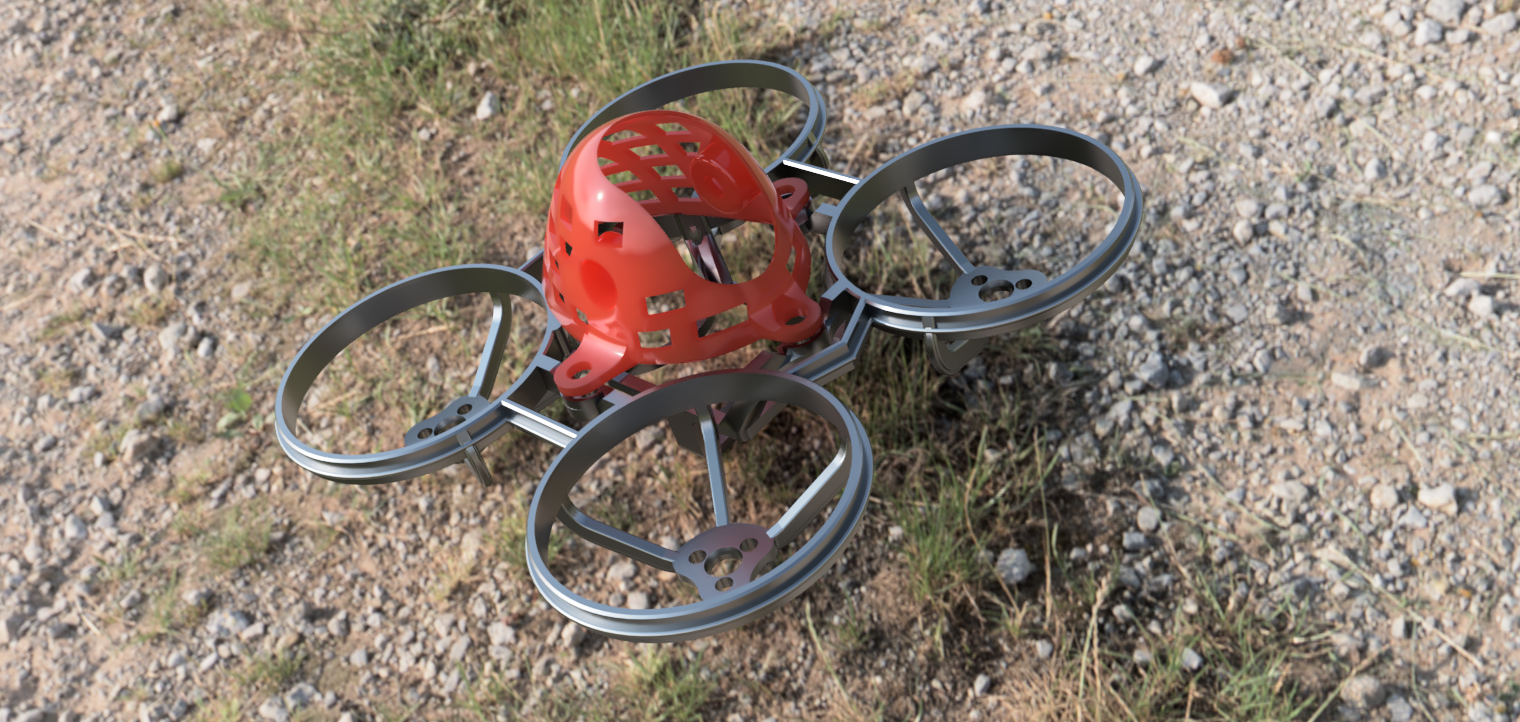
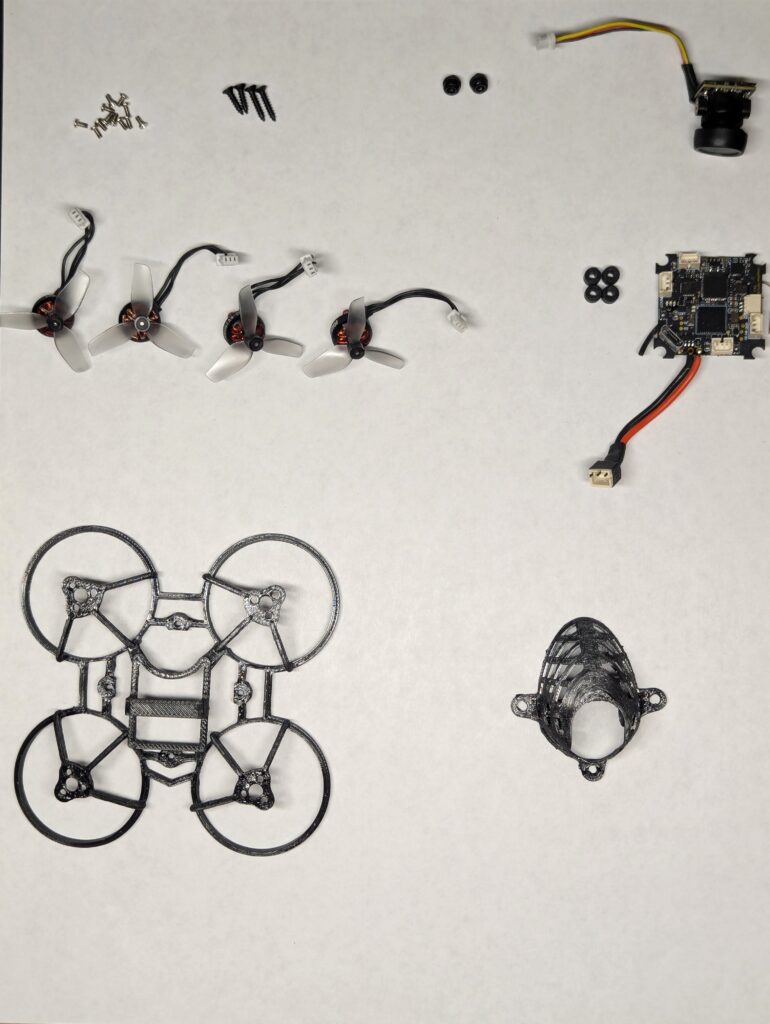
Here is an image showcasing all the parts you will need for this step:
Step 2: Mounting the Motors into the Frame
- Install the motors into the designated motor mounts.
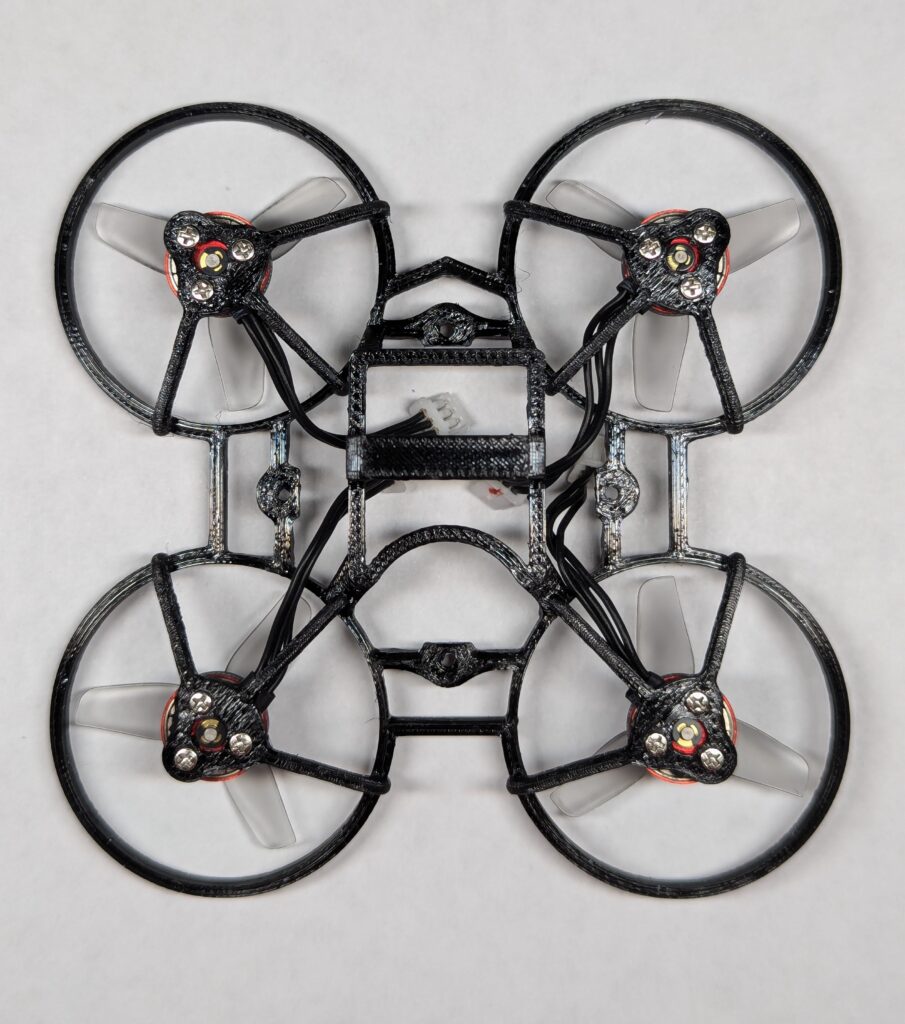
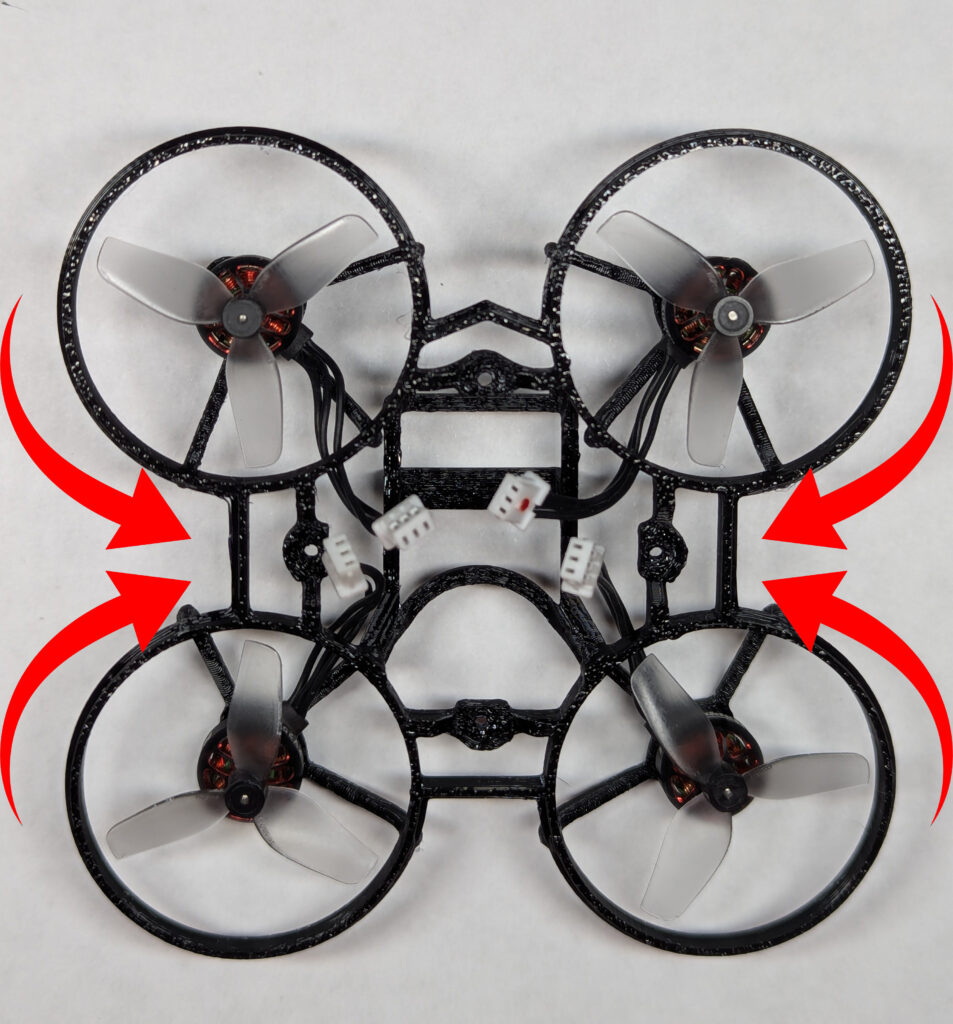
When installing the propellers, getting the rotation right is key. Here’s a quick breakdown based on the image above:
- Top-left and bottom-right propellers spin clockwise (CW).
- Top-right and bottom-left propellers spin counter-clockwise (CCW).
Make sure to install the props in the correct orientation, or your drone might end up spinning in circles instead of flying smoothly!
Step 3: Preparing and Soldering the Camera Wires
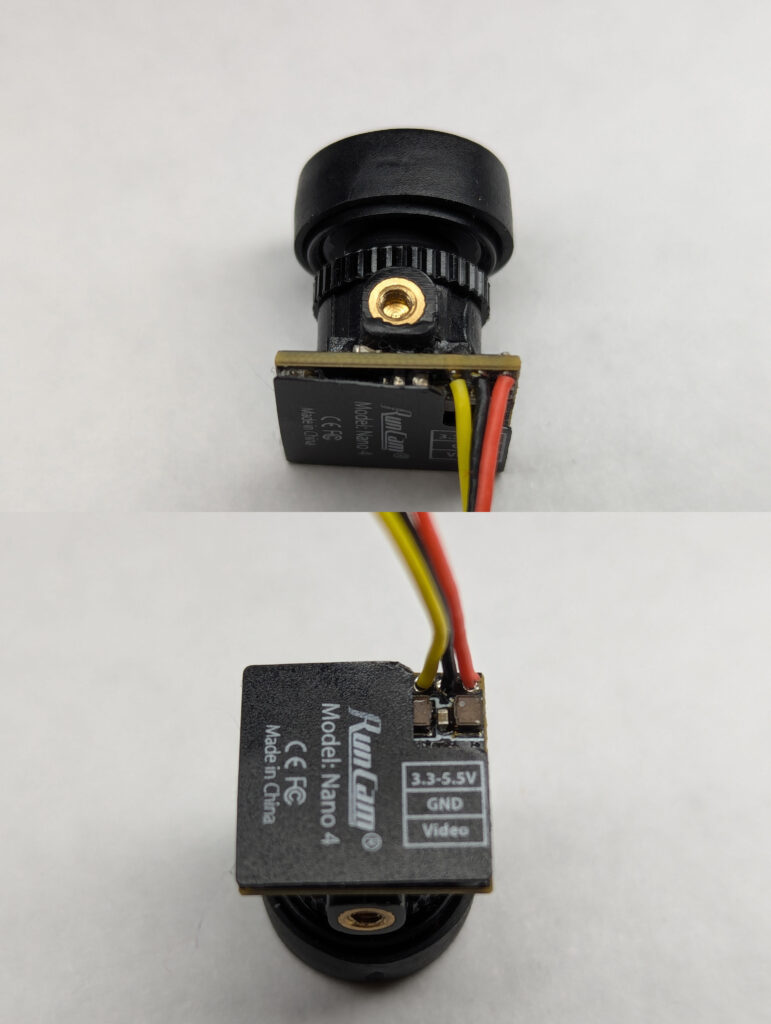
Next, let’s prepare the camera wiring.
The wire that comes with the flight controller for the camera has a male connector. To make everything compatible, we need to replace the camera’s female connector with a male connector.
- Start by carefully removing the female connector.
- Solder the new male connector to the camera wires. Match the pins to their corresponding labels:
- Red: Power (3.3-5.5V)
- Black: Ground (GND)
- Yellow: Video
Take your time with the soldering to ensure clean and solid connections.
Once this is done, you’ll have a proper connection that can easily plug into the flight controller.
Step 4: Installing the Flight Controller
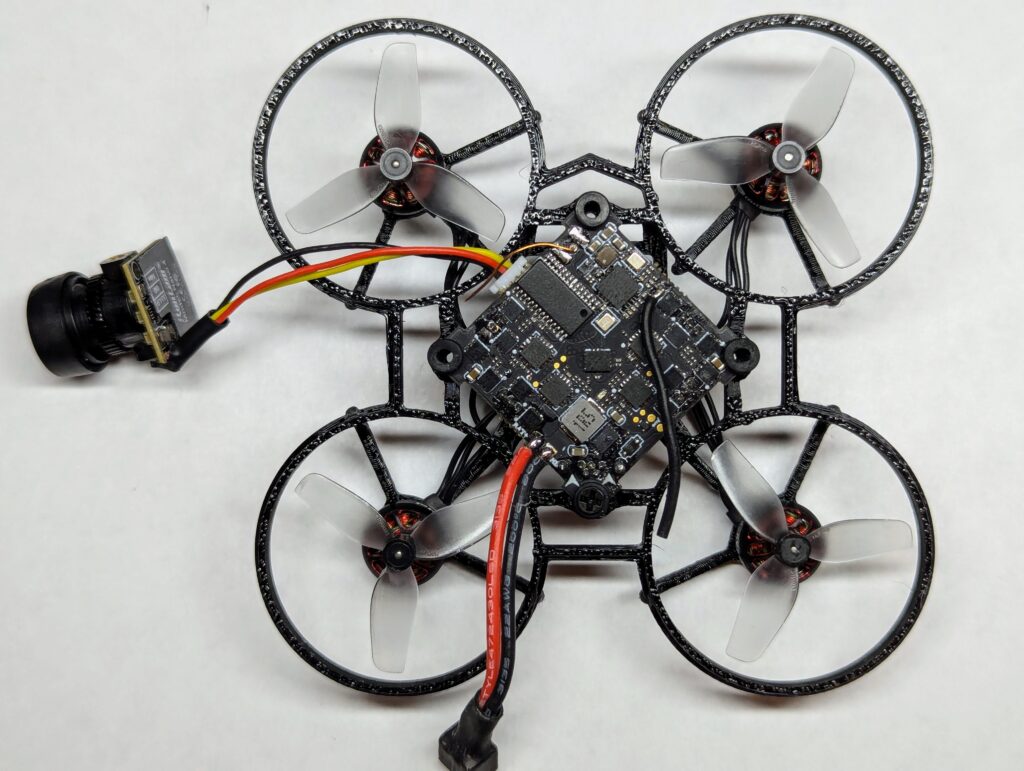
- Before mounting the flight controller to the frame, it’s a good idea to connect the motors to the flight controller first. This will save you a lot of trouble later, as it’s much easier to plug in the motor connectors now than trying to squeeze them into tight gaps once everything is screwed into place.
- Next, connect the camera to the flight controller.
- Install rubber pads and secure the flight controller with a single screw at the back of the frame. See image.
Step 5: Installing the Camera to the Canopy
Mount the camera into the canopy, making sure it’s secure and aligned properly. This ensures a clear field of view and keeps the camera stable during flight.
Step 6: Assembling Everything Together
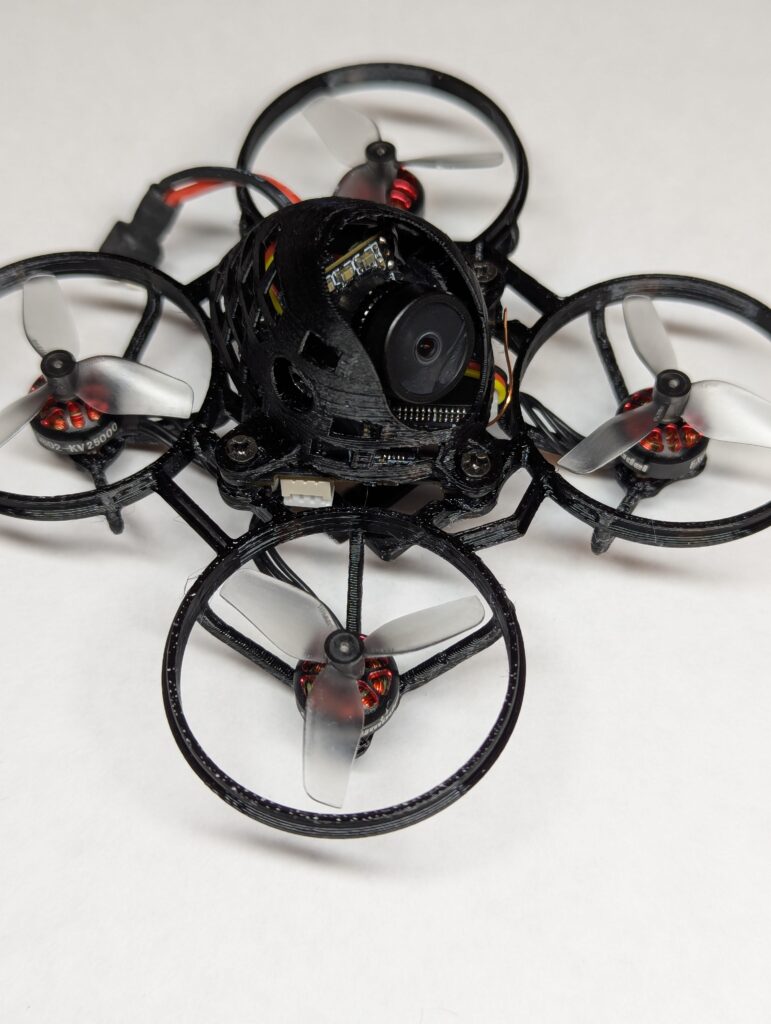
Now it’s time to bring it all together! Attach the canopy with the camera onto the frame, making sure everything fits snugly. Double-check that all wires are neatly routed and nothing is pinched or strained. Your drone is starting to look ready for action!
Step 7: Updating the Flight Controller Firmware
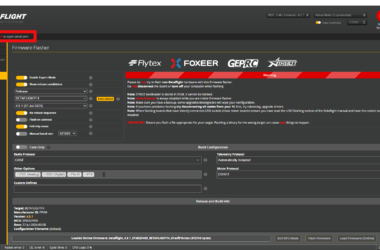
- To configure the flight controller, you’ll need to download Betaflight Configurator. Install the software on your computer, launch it, and you’re ready to start setting up your drone.
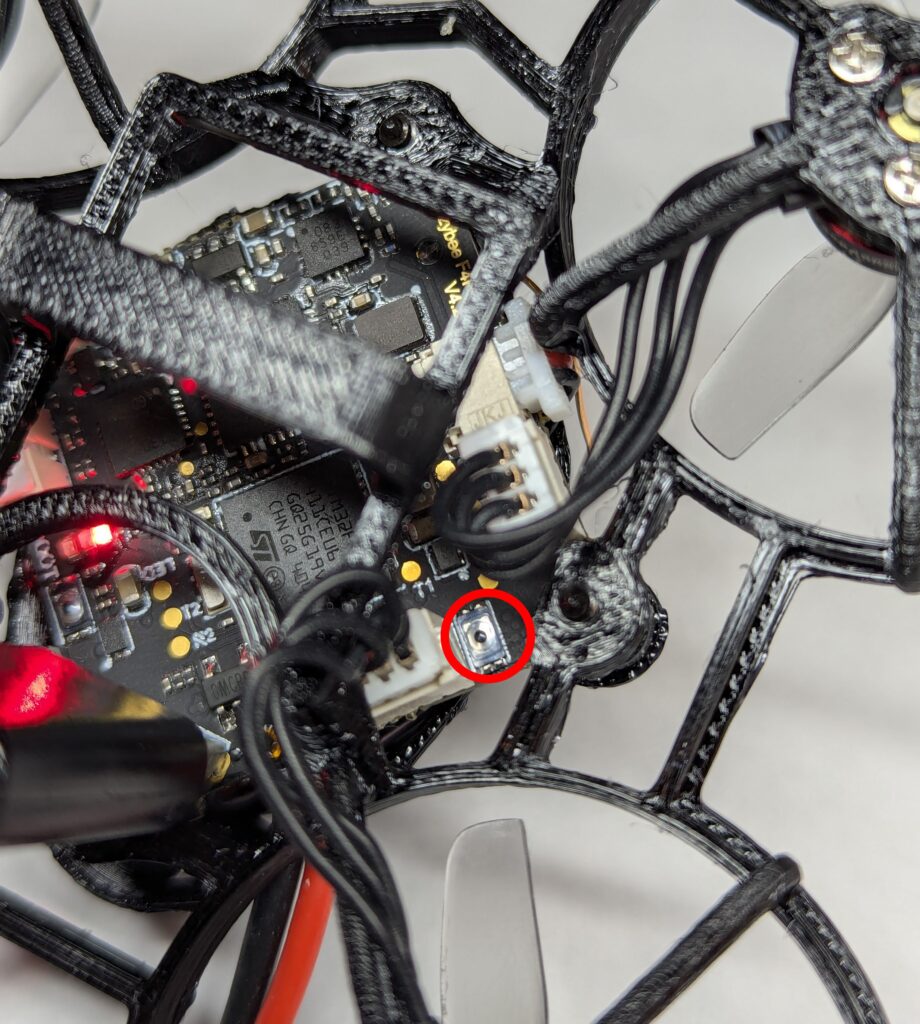
- To put the flight controller into boot mode, hold down the boot button while connecting the power (USB cable). This will allow you to flash or update the firmware.
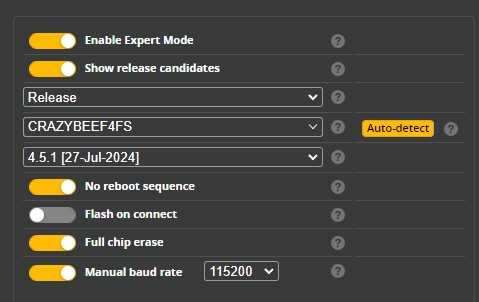
- Follow the settings shown in the picture:
1. Enable Expert Mode (toggle it on).
2. Show release candidates if needed.
3. Select the correct Flight Controller – here, it’s CRAZYBEEF4FS.
4. Choose the firmware version – in this case, 4.5.1 [27-Jul-2024].
- Click Load Firmware [Online] to download… Press Flash Firmware to install.
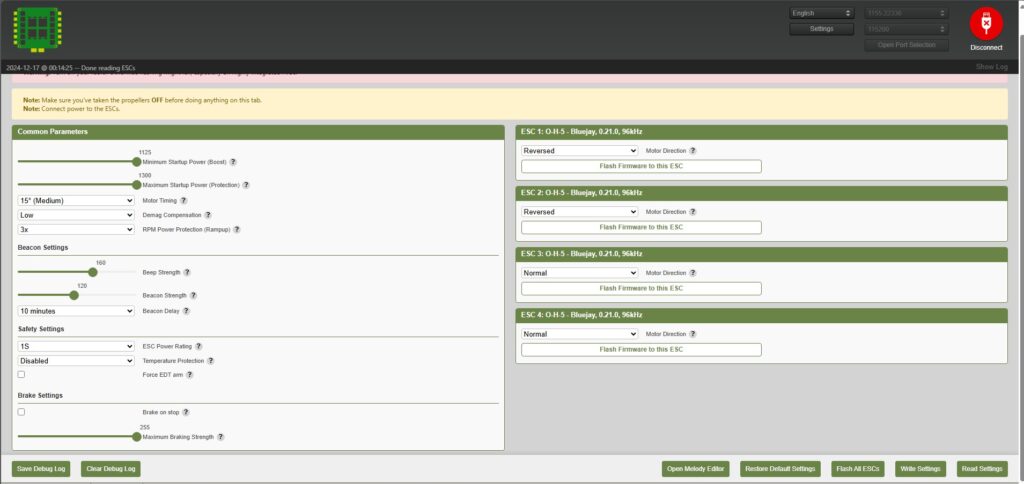
Step 8: Updating the ESC Firmware
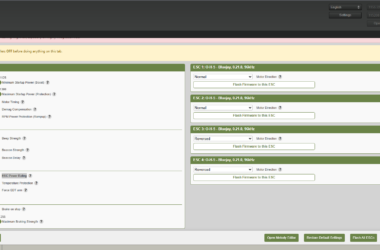
After updating the flight controller, it’s time to update the ESCs. You can do this using the ESC-Configurator tool.
- Open ESC-Configurator and click Connect.
- Once connected, click Read Settings to load the current ESC configuration.
- Select the configuration as shown in the picture to ensure the ESCs are set up correctly for your drone. Then, click Write Settings to save the changes.
With the flight controller and ESCs updated, you’re now ready to start programming your drone!
Step 9: Configuring the Flight Controller
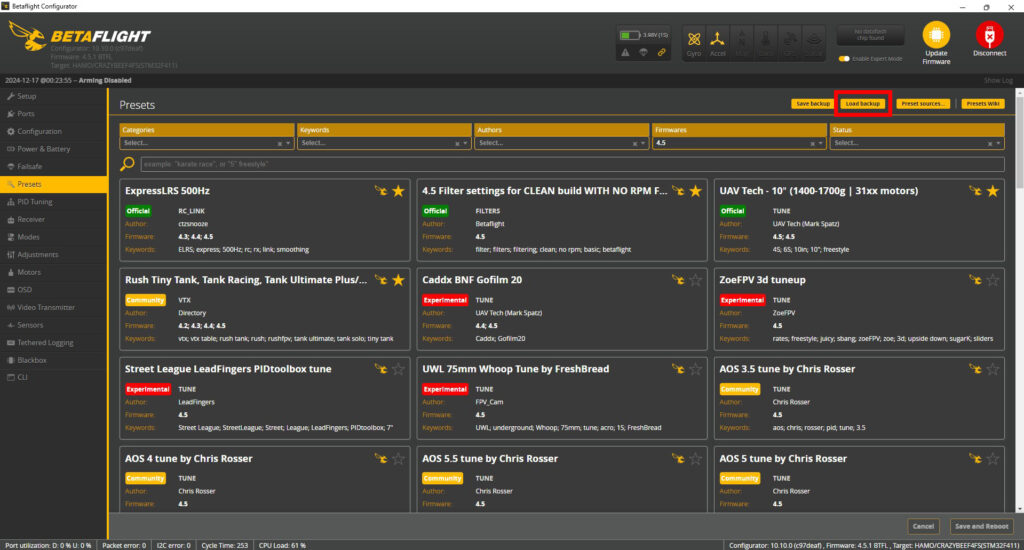
To make configuring your whoop easier and faster, I’m providing a pre-made configuration file. Simply download the file and load it into Betaflight Configurator by clicking Load Backup. This will automatically set up the key parameters for your drone.
Wrapping Up
Congratulations—you’ve built and configured your very own 1S Whoop FPV drone! From printing the frame to updating firmware, every step brings you closer to a perfectly tuned indoor flyer. Now it’s time to take it for a spin, enjoy your build, and maybe even tweak it further to suit your flying style.
If you love building drones as much as I do, stay tuned for more guides and tips. Happy flying! 🚀

